Ipswitch WS FTP Professional: Difference between revisions
No edit summary |
|||
| Line 18: | Line 18: | ||
* Click the Connections button from the top toolbar. | * Click the Connections button from the top toolbar. | ||
* Click the Site Manager button from the dropdown. | * Click the Site Manager button from the dropdown. | ||
[[File:Wsftp_SiteManager.png]] | |||
* Click the Create Site... button from the popup. | * Click the Create Site... button from the popup. | ||
[[File:wsftp_createsite.png]] | |||
* Proceed with the resulting dialogue, using any descriptive name for the Site Name. '''eg.''' My Website | * Proceed with the resulting dialogue, using any descriptive name for the Site Name. '''eg.''' My Website | ||
[[File:wsftp_sitename.png]] | |||
* From the Connection Type page, select '''"SFTP/SSH"''' if your FTP account was an SFTP-only account. If your FTP Account has Legacy FTP enabled, you may also connect with just '''"FTP"''' as the connection type. | * From the Connection Type page, select '''"SFTP/SSH"''' if your FTP account was an SFTP-only account. If your FTP Account has Legacy FTP enabled, you may also connect with just '''"FTP"''' as the connection type. | ||
[[File:wsftp_connection.png]] | |||
* Use the '''"Server/Hostname"''' on the FTP Accounts page to fill in the Server Address when prompted in the dialogue. | * Use the '''"Server/Hostname"''' on the FTP Accounts page to fill in the Server Address when prompted in the dialogue. | ||
[[File:wsftp_server.png]] | |||
* Use the full username (including hyphen and numbers) and password when prompted by the dialogue. | * Use the full username (including hyphen and numbers) and password when prompted by the dialogue. | ||
[[File:wsftp_username.png]] | |||
* You may encounter a dialogue titled "Untrusted Public Key". If you do, select the '''Trust this key''' option and click OK to continue. This will allow WS_FTP Professional to remember that this FTP server is trusted. | |||
[[File:wsftp_key.png]] | |||
[[Category:FTP]] | [[Category:FTP]] | ||
Revision as of 16:57, 17 September 2014
Setting up FTP
Before you can connect to any of your Bravenet services through a File Transfer Protocol, you will have to ensure you have FTP setup on your Bravenet account first.
- First, log into your Bravenet user account at www.bravenet.com.
- Click the FTP Accounts tab from the top of the page, as below:
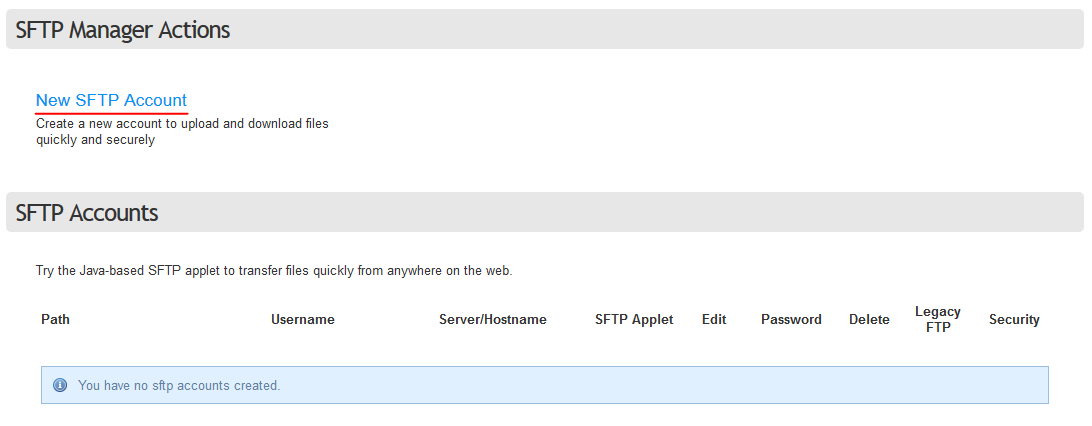
- If you have no FTP accounts created, select the "New SFTP Account" button as below:
- Fill in a username and secure password in the popup box. Note: we urge users to not use Legacy FTP, and create and use only SFTP accounts.
Congratulations, you now have an FTP account that you can use to connect to your website with!
Creating a Connection in WS_FTP
With the hostname, username, and password of your FTP account at hand, you can run WS_FTP Professional and prepare to make a connection to your site.
- Click the Connections button from the top toolbar.
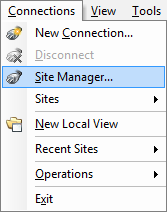
- Click the Site Manager button from the dropdown.
- Click the Create Site... button from the popup.
- Proceed with the resulting dialogue, using any descriptive name for the Site Name. eg. My Website
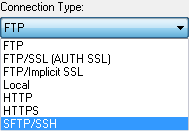
- From the Connection Type page, select "SFTP/SSH" if your FTP account was an SFTP-only account. If your FTP Account has Legacy FTP enabled, you may also connect with just "FTP" as the connection type.
- Use the "Server/Hostname" on the FTP Accounts page to fill in the Server Address when prompted in the dialogue.
- Use the full username (including hyphen and numbers) and password when prompted by the dialogue.
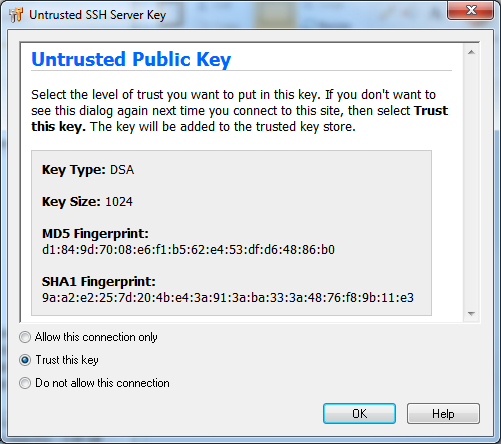
- You may encounter a dialogue titled "Untrusted Public Key". If you do, select the Trust this key option and click OK to continue. This will allow WS_FTP Professional to remember that this FTP server is trusted.


