Apple Mail: Difference between revisions
No edit summary |
No edit summary |
||
| Line 1: | Line 1: | ||
# Start Mail | # Start Mail | ||
# If the New Account wizard does not start, click on '''Mail''', then '''accounts''', then | # If the New Account wizard does not start, click on '''Mail''', then '''accounts''', then click the '''+''' to create a new account<br/>[[File:AppleMail7Service.png| Service]] | ||
# Select '''Add Other Mail Account''' | # Select '''Add Other Mail Account''' | ||
# Type in your Full Name, Email Address, and your password | # Type in your Full Name, Email Address, and your password | ||
Revision as of 18:06, 2 April 2014
- Start Mail
- If the New Account wizard does not start, click on Mail, then accounts, then click the + to create a new account

- Select Add Other Mail Account
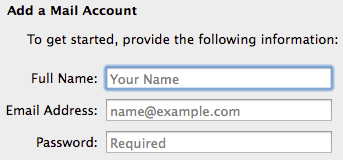
- Type in your Full Name, Email Address, and your password
- Under Add a Mail Account, Fill out the following fields:
- Account Type - IMAP (or POP)
- Mail Server - mail.bravehost.com
- User Name - enter your Bravenet email address
- Password - enter the password for the Bravenet email address
- Under Incoming Mail Server Info, Fill out the following fields:
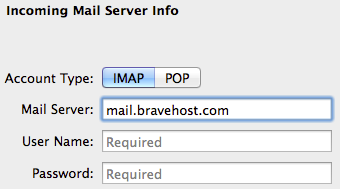
- Mail Server - mail.bravehost.com
- User Name - enter your bravenet email address
- Password - enter your bravenet email address
- Under Outgoing Mail Server Info, Fill out the following fields:
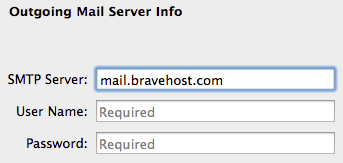
- SMTP Server - mail.bravehost.com
- User Name - enter your bravenet email address (Required)
- Password - enter your bravenet email address (Required)


