Thunderbird: Difference between revisions
Created page with "Thunderbird is a free, open source email client developed by the Mozilla Foundation. =Configuring Thunderbird for your BraveHost Account= # Start Thunderbird # Click '''File'..." |
Clarified username field |
||
| Line 1: | Line 1: | ||
Thunderbird is a free, open source email client developed by the Mozilla Foundation. | Thunderbird is a free, open source email client developed by the Mozilla Foundation. | ||
=Configuring Thunderbird for your | =Configuring Thunderbird for your Bravehost Account= | ||
# Start Thunderbird | # Start Thunderbird | ||
# Click '''File''', '''New''', then the '''Existing Mail Accounts option''' | # Click '''File''', '''New''', then the '''Existing Mail Accounts option''' | ||
| Line 10: | Line 10: | ||
# Click '''Continue''' | # Click '''Continue''' | ||
# Click on '''Manual Settings'''<br/>[[File:thunderbirdServerConfig.png| Server Settings]] | # Click on '''Manual Settings'''<br/>[[File:thunderbirdServerConfig.png| Server Settings]] | ||
## | ## In the '''Username''' field, enter you Bravenet e-mail address | ||
## Change the Incoming '''Server Hostname''' to mail.bravehost.com | ## Change the Incoming '''Server Hostname''' to mail.bravehost.com | ||
## Change the Outgoing '''Server Hostname''' to mail.bravehost.com | ## Change the Outgoing '''Server Hostname''' to mail.bravehost.com | ||
Revision as of 15:16, 12 June 2012
Thunderbird is a free, open source email client developed by the Mozilla Foundation.
Configuring Thunderbird for your Bravehost Account
- Start Thunderbird
- Click File, New, then the Existing Mail Accounts option
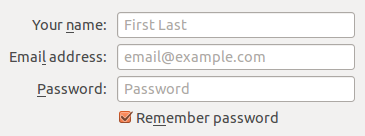
- Fill out the following fields:

- Your Name - Enter your name here
- Email Address - Enter your Bravenet e-mail address
- Password - Enter the password for the Bravenet e-mail address
- Click Continue
- Click on Manual Settings

- In the Username field, enter you Bravenet e-mail address
- Change the Incoming Server Hostname to mail.bravehost.com
- Change the Outgoing Server Hostname to mail.bravehost.com
- Change the Outgoing Port to 465.
- Click on Re-test to finish configuring the servers.
- Note that Outgoing SSL will now be set to STARTTLS, as long as the port is set to 465 before clicking Re-test
- Click the Create Account button and your account should now work correctly
You can test your incoming and outgoing mail settings by sending yourself an email.
