Pegasus mail
Pegasus Mail is a free email client with a number of useful and great features. It first came out in 1990 and has been supported since, though it's interface can come across as dated; rest assured, appearances aside, it is a highly effective email client.
- Download and install Pegasus Mail from the Pegasus Mail website.
- Start Pegasus Mail.
- If this is the first time starting Pegasus Mail, the Internet Startup Wizard will appear. If the wizard does not, you can navigate to it through File > Network configuration... > Start Setup Wizard...
- Press Next to proceed with setting up your account.
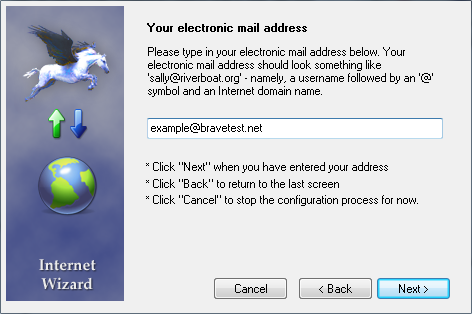
- Fill in your email address for your Bravenet email account and press Next.
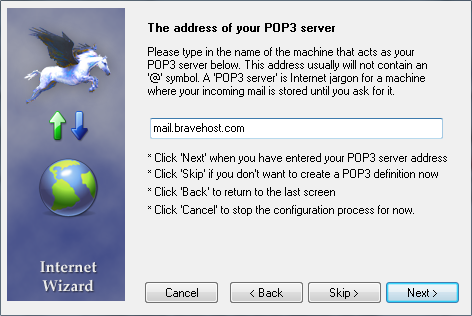
- Type in the address of your POP3 server. This will usually be mail.bravehost.com if using Bravenet email services. Press next.
- Fill in the email account address for the "User Name", and the email accounts password for the password. Next.
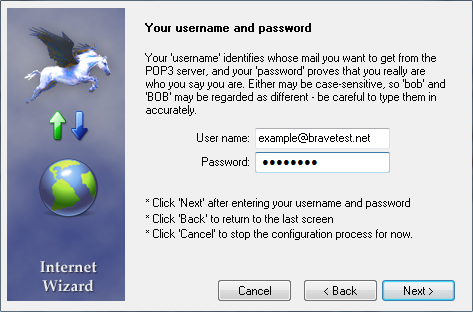
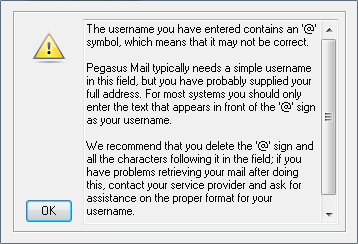
- You will likely encounter a warning popup at this point, indicating that you may have entered the User Name incorrectly. It states that the User Name should not include the @domain part. This is correct for some hosts, but not for us; be sure to include the full email account as the User Name. It is safe to press OK and ignore this warning.
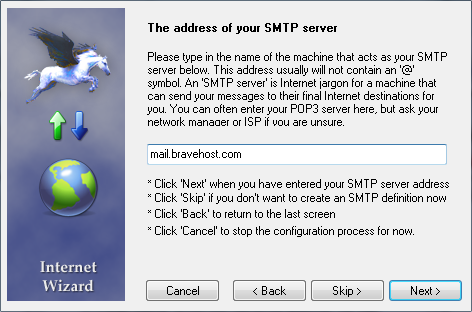
- Type in the address of your SMTP server. This is the server you send the emails from. This should also be mail.bravehost.com unless you have another outgoing mail server. Press next.
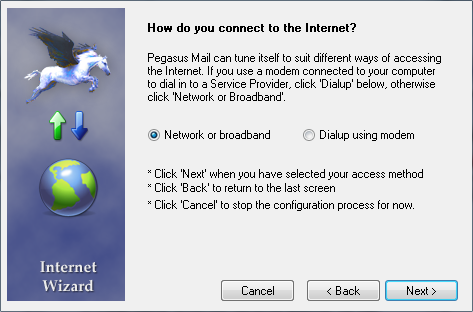
- For this step, you should check Network or broadband, unless you have a dial-up connection. Next.
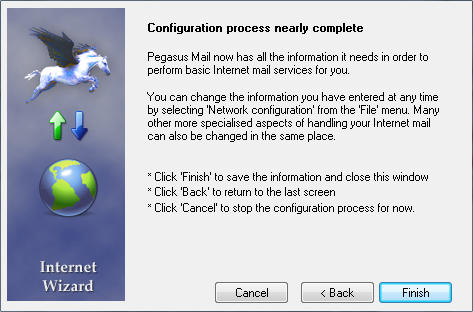
- You are now done the configuration process. Press the Finish button to finish setting up the email account with Pegasus Mail.